There are many third-party programs out there with funny names that try to incorporate “insta” or “gram” or “pic” somewhere, but after trying out many on my own, I suggest staying away from them. None of them seem to work properly and it’s probably because Facebook really wants people to use their own apps to browse Instagram. Luckily, you can use the web interface to search and browse Instagram on your Windows, Mac or Linux PC. For me, being able to view the pictures on my desktop is more pleasing to the eye than on my small smartphone. Viewing Instagram pictures on a tablet like the iPad is also way better than using the mobile apps. Unfortunately, since most people use Instagram from their mobile device, the web version hasn’t improved much over the years. The biggest problem is that the web interface still displays images at a horribly low resolution (600×600). Luckily, there is a trick you can use to view a higher resolution version of the picture (1080×1080), which I will mention below. Note that the original image may be a much higher resolution, but the full resolution photo doesn’t even get saved.
Browse & Search Instagram
When you log into Instagram from the web, you’ll see images from your personal feed (the people you follow).
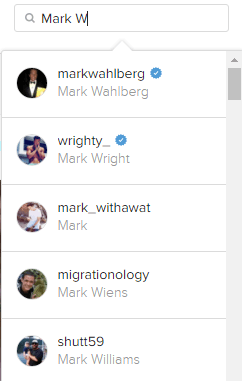
At the top right, you’ll see three small icons. The first icon with the diamond in the center is the Explore feature. It doesn’t quite work exactly the same as the explore tab on the smartphone app. There you see a lot more pictures and videos that are popular or that their algorithm determines you might like. On the web, it seems like the explore feature just shows you content from people you may know. Also, it really doesn’t show up more than just a new users and that’s it. Overall, it’s quite a lame discover/explore tab. The best way to use the web interface is to search for the stuff you are interested in. You can search in one of three ways: for people, for places or for hashtags. If you’re looking for someone in particular, just type in their name in the search box or type in their Instagram user name.
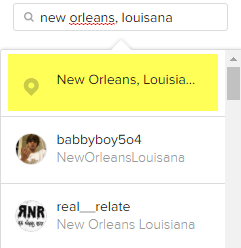
The list of results is not random. It’ll first try to show you people you are following, followed by famous or verified people. Those users have a little blue star with a check mark in the center (verified badge). To search for places, just type in the location. Note that in the results, you should see the map icon instead of the hastag icon for an actual location.
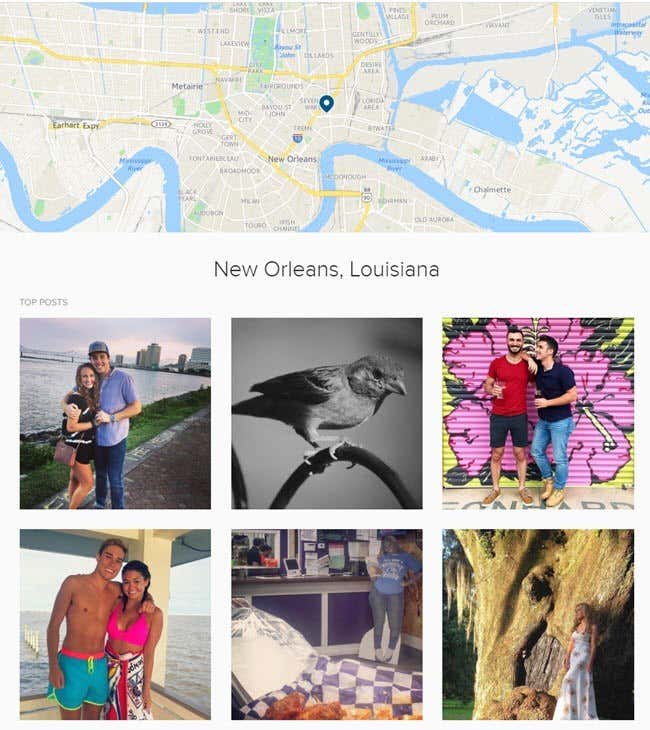
When you click on the result, you’ll get a map at the top along with the Top Posts for that location. If you keep scrolling, you’ll see the Most Recent posts also.
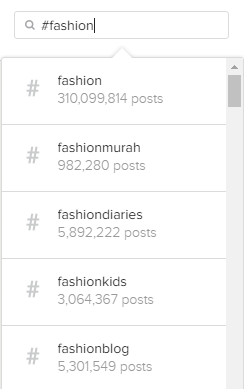
Finally, you can search for hashtags, which are the main way people tag their photos and videos on Instagram. Just start with the hashtag symbol (#) and type in your interest.
As you type, you’ll get lots of suggestions that can help you find exactly what you are looking for. Again, the results page will show you top posts and most recent below that.
The only issue, like I mentioned above, is that when you click on an image, the display size is tiny! Even beautiful high resolution photos are shown in a small box.
It would be fabulous if you could just click on the image again and it would appear full-screen or at its highest resolution, but that just doesn’t happen. Luckily, there are a few quick hacks you can use to get the highest resolution image stored by Instagram.
View High Resolution Images on Instagram
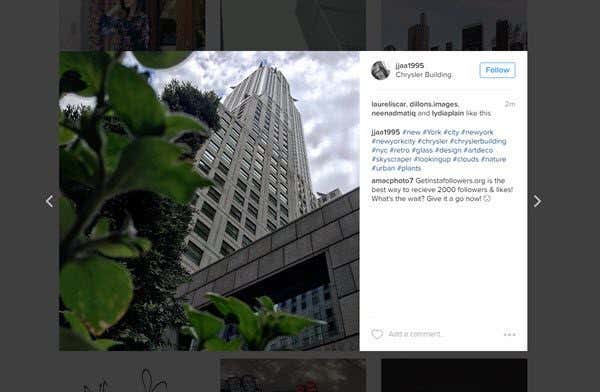
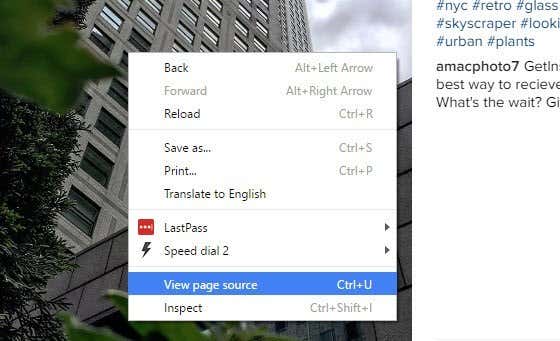
In order to get the better quality image from Instagram, you have to look through some source code. It’s not the most elegant way or the easiest per say, but it’s the only way as of now. Luckily, the instructions are really easy to follow and you really don’t have to understand anything about the code. All you have to do is click a few times and copy/paste. The first thing you should do is click on the image so that it appears like the screenshot above in a lightbox. Now right-click on the image and choose View Source or View Page Source. This option should be available on all major browsers. Note that if you don’t see the option, try right-clicking again on a different part of the page.
You’ll see a whole bunch of code that might not make sense, but that’s fine. Press CTRL + F on your keyboard to bring up the Find on Page search box.
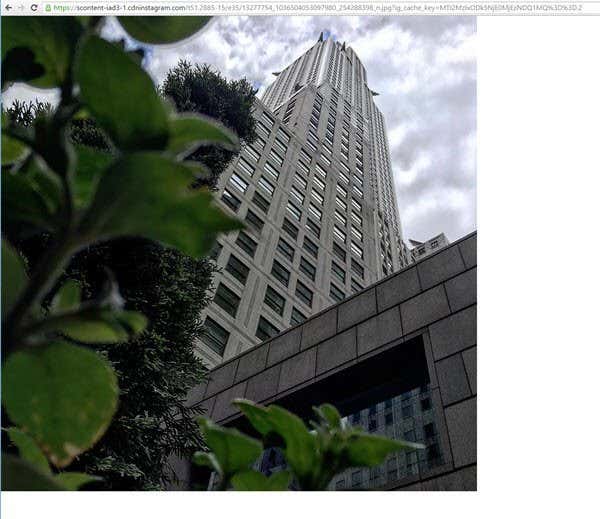
You will probably get about 15 results, but the only one you are interested in is the one where the line starts with <meta property=”og:image”. You’ll see the phrase cdninstagram is inslide of a long URL that starts with https://scontent-iad3-1 or something similar. All you have to do is copy that entire link between the start and end quotes. Open a new tab and paste that into the address bar:
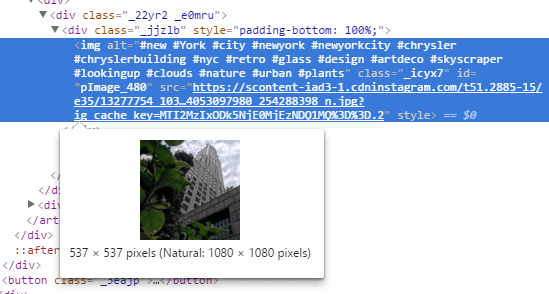
You should now see the entire 1080×1080 max resolution image in the browser window. You can right-click on it to save it if you like. If that doesn’t work, there is another way to find the URL. Firstly, you should use Google Chrome. When you right-click on the lightbox image, choose Inspect instead of view source.
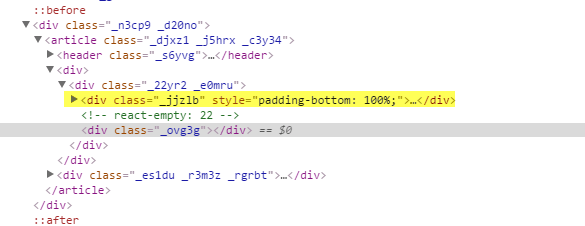
Again, you’ll see the source code in all its technical glory. If you right-clicked on the image when choosing Inspect, it should have an inner DIV highlighted. Right above that, you should see a DIV with a class=”_jjzlb” value. Expand that and you’ll see the same link I had mentioned above.
You can click on the <IMG section to highlight it and if you hover your mouse over the HTTPS link, you’ll see it shows you the size Instagram is displaying the image at and the “natural” size of the image. Just right-click on the link and choose Copy link address. Again, just paste it into another tab to view the full resolution image. Overall, using the web interface is the best way to browse Instagram from a computer. Hopefully, in the future, Facebook will update the web interface so that you can view the higher resolution images without the hack. Enjoy!
